
You do not need to be a graphic designer or a computer expert to set up an Etsy digital shop. You need one helpful product, a few clear pictures, and the willingness to take one small step at a time. Your first shop does not need to be perfect. It simply needs to be open and ready for someone to buy from it.
If you are new to digital products and want to understand the whole process before opening your shop, read Can Beginners Sell Digital Products? for a complete beginner-friendly guide.
Step 1: Choose One Simple Digital Product
Before you set up an Etsy digital shop, you need a digital product to sell. A digital product is a file your customer buys and downloads. Nothing is packed, mailed, or stored in your home, making it a practical choice for a side hustle.
For your first product, choose something simple that solves a small problem. Do not try to create a 50-page planner before you have made your first listing. A one-page product can be enough.
Beginner-friendly ideas include:
A weekly meal planner in Canva, A daily habit tracker, A cleaning checklist, A budget worksheet, A printable to-do list, A simple party planning checklist.
Think about a person who needs help getting organized. What could make their day a little easier? That is a good place to start.
Your action: Write down one product idea that you could create this week.
Step 2: Create Your File in Canva
Once you set up an Etsy digital shop, you will need a product ready to upload. Canva is a beginner-friendly design tool with a free version. You can use it to make printables, planners, checklists, and templates without knowing how to draw or use complicated software.
Open Canva and search for the type of product you want to make. For example, type “weekly planner” or “checklist” into the search bar. You will see many ready-made layouts. Pick a clean, simple design and change the words, colors, and sections to fit your idea.
Keep your first design easy to read. Use one or two fonts. Leave space for your customer to write. Avoid adding too many colors or decorations. A useful worksheet is usually better than a busy worksheet.
When your design is finished, click Share, then Download. For a printable product, choose PDF Print. Save the file somewhere you can find easily, such as a folder called “Etsy Products.”
Before moving on, open the PDF and check it carefully. Look for spelling mistakes, cut-off words, and blank pages.
Your action: Create and save one finished PDF file.
Step 3: Make Product Pictures Before You Open Your Shop
Before you set up an Etsy digital shop, create product pictures that clearly show buyers what they will receive. People cannot touch a digital product before they buy it, so your pictures help them understand exactly what they are purchasing.
In Canva, create a new design for your listing image. You can use a square size, such as 2000 by 2000 pixels. Add a photo or mockup of your printable, then place a clear title on the image. For example: Weekly Meal Planner Printable.
A mockup is simply a picture that shows your product on a screen, desk, or clipboard. Canva has mockup options, or you can keep it simple and show a clean screenshot of your pages.
Create at least five images if you can. Show the cover or main page, a close-up of the details, a page in use, what is included, and a simple image that says Digital Download. This helps prevent confusion later.
Do not put tiny paragraphs of text on your pictures. Use large words that are easy to read on a phone.
Your action: Save at least three product images in your Etsy Products folder.
Step 4: Open Your Etsy Seller Account
Now it is time to set up an Etsy digital shop by opening your Etsy seller account. Go to Etsy and choose the option to sell on Etsy. You will be asked to create an account or sign in if you already have one.
Etsy will walk you through a few setup questions. Choose your language, country, and currency. Then choose a shop name. Your shop name should be simple, easy to spell, and connected to the kind of products you want to sell.
For example, if you plan to sell planning printables, a name like Simple Day Printables is clearer than a name full of random numbers or hard-to-spell words.
Do not spend days worrying about the name. Choose something clear and descriptive. Your products and customer service will have a much bigger impact on your success than having a clever shop name.
Etsy will also ask for payment and billing information. This is how Etsy sends you money after a sale and charges listing fees. Fill out this section carefully using your legal information.
Your action: Create your seller account and choose a simple shop name.

Step 5: Start Your First Etsy Digital Listing
Now that you have created your account, it is time to set up your Etsy digital shop by creating your first listing.
Inside your Etsy Shop Manager, look for Listings and select the option to add a listing. Etsy may update the wording or page layout over time, but the main sections will remain similar.
First, add your product photos. Use your clearest image first because it is often the first picture shoppers see in search results.
Next, choose the product type. Select Digital for a product the customer downloads. This is very important. If you accidentally choose a physical item, Etsy may ask for shipping details that you do not need.
Then add your title. Use plain words that clearly describe your product. A title like Weekly Meal Planner Printable, Grocery List and Menu Planner PDF tells shoppers exactly what they are looking at.
You do not need fancy wording. Clear, descriptive titles are more helpful.
Your action: Begin a draft listing and upload your product photos
Step 6: Write a Description That Answers Basic Questions
As you set up your Etsy digital shop, your product description should help buyers feel confident about what they are getting. Start with one clear sentence. Then explain what is included and how it works.
You can write something like this:
“This weekly meal planner is a printable PDF designed to help you plan meals, make a grocery list, and save time each week.”
Then include the details your buyer needs. Mention the number of pages, page size, file type, and whether the item is editable. If it is not editable, say so clearly.
Also add a reminder such as:
“This is a digital download. No physical item will be mailed.”
That one sentence can prevent many customer questions.
Be honest. Do not say a file is editable if it is only a PDF. Do not promise it works with every app unless you have tested it.
Your action: Write a short description that explains exactly what your customer will receive.
Step 7: Add the Digital File and Set a Starting Price
Before you set up your Etsy digital shop for customers to purchase from, upload your finished digital file. Find the section where Etsy asks you to upload the digital file. Add the PDF you saved from Canva. If your product includes several files, you may need to place them in a ZIP folder first. A ZIP folder is simply one folder that holds several files together.
For your first simple printable, choose a starting price that reflects the value you provide. Many beginners start with a lower price while they learn what customers respond to. You can always change your price later.
Remember that Etsy charges fees for listings and sales. Review the fee information in your seller account before you publish. You do not need to memorize every fee right now, but you should understand that selling on Etsy is not completely free.
Lower prices can help a new shop get started, but do not price your product so low that it undervalues your work. Your time and helpful ideas have value.
Your action: Upload your final file and choose a simple starting price.
Step 8: Choose Tags and Categories with the Customer in Mind
Tags are short search phrases that help Etsy understand your product. Think about what a customer might type into the search bar when looking for a product like yours.
For a weekly meal planner, useful phrases may include meal planner printable, weekly menu planner, grocery list PDF, and kitchen planner. Choose phrases that accurately describe your product.
You can also select a category that fits your item. Etsy will often suggest options as you type. Choose the closest match instead of getting stuck trying to find the perfect one.
Avoid using unrelated popular search terms just to get attention. Someone looking for a wedding invitation will not be happy if they find your cleaning checklist instead.
Your action: Add search phrases that describe your product in everyday language.
Step 9: Publish, Check, and Keep Going
Read through your listing one final time. Check your title, photos, description, price, and digital file. Then publish it.
That moment can feel scary. Many beginners worry they will make a mistake or that nobody will buy right away. Both feelings are normal. Your first listing is not a final exam. It is simply your starting point.
After publishing, view the listing as if you were a customer. Can you quickly tell what the product is? Is it clear that it is a digital download? Are the images easy to understand? Fix anything that could confuse a buyer.
Then create a second product. Shops with several related items give customers more choices and give you more opportunities to be found. You do not need to create everything at once. One useful product each week is real progress.
Digital Launch Academy teaches this same steady approach: create one simple product, finish it, list it, and learn as you go. Your first sale may take time, but every listing builds your confidence and strengthens your shop.
Your next small step is enough. Open Canva, choose one idea, and create your first product today.
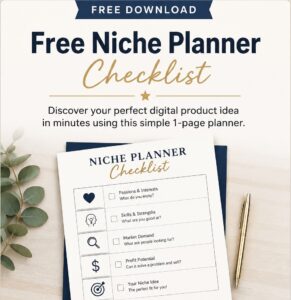
Don’t Know What to Create?
Most beginners don’t fail because they lack talent. They fail because they’re overwhelmed by too many ideas. Download the Free Niche Planner Checklist and discover a digital product idea you can actually build.
