
A digital product starter course should not leave you staring at a blank screen, wondering what to do first. It should help you make one useful item, using simple tools, and show you how to offer it for sale. No coding. No graphic design degree. No expensive computer setup.
I understand the fear of getting started because I was there too. When every video uses new words and every tool has ten buttons, it is easy to think, “Maybe this is not for me.” But you do not need to learn everything. You only need a clear first project.
What a Digital Product Starter Course Should Teach You
Your first digital product does not need to be a huge course, a fancy app, or a 100-page book. Start with something small that helps a real person solve one everyday problem.
A good beginner course should walk you through these basic jobs:
- Choose a simple product idea.
- Make the product in Canva or another easy tool.
- Write a clear title and short product description.
- Save your files correctly.
- Put the product on a simple selling platform.
- Tell a few people about it without feeling pushy.
That is enough for a first launch. You can improve later, after you have learned what people respond to.
Start Your Digital Product Starter Course with a Small Project
Many beginners make the same mistake. They try to create a product for everyone, with every possible feature. Then the project feels too big, and it never gets finished.
Instead, choose one person and one small problem. A weekly meal planner helps someone plan dinners. A medication tracker helps someone remember daily medicine. A moving checklist helps a family stay organized before a move.
Small products are not “less than.” They are easier to finish, easier to explain, and easier for a buyer to use. Your first goal is not perfection. Your first goal is a finished product that is helpful.
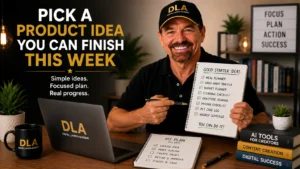
Step 1: Pick a Product Idea You Can Finish This Week
Choose a topic you already know from daily life, work, hobbies, or family experience. You do not have to be the top expert in the country. You simply need to make something clear and useful.
Ask yourself three questions:
- What do people often ask me for help with?
- What task do I repeat every week or month?
- What simple tool would have made my own life easier?
For example, if you enjoy gardening, you could make a garden watering log. If you care for an older parent, you could make a family care schedule. If you love planning trips, you could make a weekend packing checklist.
Keep your first product narrow. “A planner for everything” is hard to create. “A two-page weekly cleaning planner for busy adults” is much easier. If you need help checking whether your idea is worth creating, follow the Beginner Guide to Product Validation.
Use AI for Ideas, Not for Confusion
AI can help you get unstuck, but you stay in charge. Open your preferred AI chat tool and type a plain request like this:
> Give me 10 simple digital product ideas for people who want to organize their weekly meals. Each idea should be easy to make in Canva.
Read the answers and choose the idea that feels easiest. Then ask:
> Create a simple outline for a printable weekly meal planner. Include only the sections a beginner needs.
You do not need to copy every word AI gives you. Treat it like a helpful assistant making suggestions. Use your own common sense and life experience to make the product better.
Step 2: Create Your First Project in Your Digital Product Starter Course
Canva is a friendly place to begin because it has ready-made page sizes, templates, and simple drag-and-drop tools. You can use a free account for many starter projects.
First, open Canva and click Create a design. For a printable planner, choose US Letter size. For a phone-friendly checklist, choose a document or social-media-style size that is easy to read on a screen.
Next, search Canva templates using simple words such as “weekly planner,” “checklist,” “tracker,” or “workbook.” Pick a clean design with plenty of white space. Avoid tiny text, busy backgrounds, and too many colors.
Then make it your own:
- Click the existing title and type your product title.
- Replace the sample sections with your own helpful sections.
- Use one or two easy-to-read fonts.
- Choose two or three colors that work well together.
- Add extra pages only when they serve a clear purpose.
If this feels new, use a ready-made template. There is no prize for starting from a blank page. Templates save time and help your product look organized from the beginning.
Keep the Design Easy to Use
Think about the person who buys your product. Can they understand it in five seconds? Can they write in the spaces? Can they print it at home without using a lot of ink?
A useful planner needs room to write. A useful checklist needs clear boxes. A useful guide needs short sections and plain words. Fancy design is optional. Clear design is not.
Before you move on, print one page if you can. Or ask a friend to look at it on their phone. If they have to ask what a section means, simplify it.
Step 3: Save the Right File
When your pages are ready, click Share, then Download. For a printable product, choose PDF Print. For a simple screen-based guide, a regular PDF often works well too.
Give the file a clear name. Instead of “finalfinal2.pdf,” use something like “Weekly-Meal-Planner.pdf.” Put it in one folder on your computer so you can find it later.
If your product includes more than one file, place all files in a single folder first. Check that every page opens correctly. This small step prevents a lot of stress after someone buys from you.
Step 4: Write a Simple Product Listing
You do not need clever sales language. Tell people what the product is, who it helps, and what they receive.
Use this easy format:
Title: Weekly Meal Planner for Busy Families
What it helps with: Plan dinners, make a grocery list, and reduce last-minute meal stress.
What the buyer receives: A printable PDF with a weekly meal page, grocery list, and notes page.
How to use it: Download the file, print it at home, and fill it in each week.
Be honest. If the product is a digital download, say clearly that no physical item will arrive in the mail. If it is for personal use only, say that too.
A short, clear description builds more trust than a long description full of big promises.
Step 5: Sell the Product You Created in Your Digital Product Starter Course
Choose one beginner-friendly selling platform that lets you upload a digital file and create a product page. Do not spend days comparing every option. Pick one, learn the basic steps, and move forward.
On the product setup page, you will usually add your title, description, price, product image, and PDF file. Use a screenshot or a Canva-made cover image so buyers can see what the product looks like.
For your first price, keep it simple and reasonable for the size of the product. A one-page checklist may be a low-cost item. A larger planner with several useful pages may be priced higher. Look at the effort involved, the usefulness of the item, and what feels fair to your buyer.
If you’re unsure what to charge, follow How to Price Digital Downloads Without Guessing.
You may not make sales on the first day. That does not mean you failed. Your first product teaches you how the process works. That knowledge is valuable, and it makes product number two much easier.
Step 6: Tell People Without Feeling Salesy
You do not have to post all day or pressure friends. Start by sharing the product where the right people may naturally care about it. That could be your personal social page, a relevant community group that allows promotions, or a small email list if you have one.
For a simple beginner plan for promoting your product, follow How to Market Your First Digital Product Step by Step.
Write like a helpful neighbor. For example: “I made a simple weekly meal planner for anyone who is tired of figuring out dinner at the last minute. It includes a grocery list and is ready to print.”
Show one page of the product. Explain the problem it helps solve. Then give people time. Quiet, steady sharing is often easier to maintain than trying to be everywhere at once.
When You Feel Stuck, Go Back One Step
Tech problems happen. Canva may look different after an update. A file may save in the wrong place. You may forget which button you clicked. None of that means you are bad at this.
Pause and return to the last step that made sense. Check your file name. Read the screen slowly. Ask for help when you need it. Support matters, especially when you are learning something new. This is one reason Digital Launch Academy includes live beginner Q&A support alongside simple lessons, templates, and prompts.
Your first product may be a modest planner, tracker, or guide. That is perfectly fine. Finish it, share it, and let yourself be proud of taking a step many people keep putting off. A small, useful product made by you is a real beginning.
A good digital product starter course gives you the confidence to finish your first product and prepares you to create many more in the future.

At Digital Launch Academy, we believe your first digital product is not about getting everything perfect. It is about proving to yourself that you can take an idea, turn it into something useful, and put it out into the world. Start small, stay calm, and finish the next step in front of you. Grab our free niche planner checklist.
