
A $3 price can feel safer when you are new. But it can also make your hard work feel small. Learning how to price digital downloads is not about finding one magic number. It is about choosing a fair starting price, putting your product out there, and making small changes as you learn.
When I first started, I worried that nobody would buy unless my price was very low. Many beginners feel the same way. The good news is that you do not need business experience, fancy software, or complicated math to price a planner, tracker, template, or guide.
Start With the Value, Not Your Nerves
Your price should reflect what your download helps someone do. A simple product can still be very useful.
For example, a meal planner may help a busy parent save time each week. A medication tracker may help an older adult stay organized. A job search checklist may help someone feel less overwhelmed. The file may be short, but the help it gives can be meaningful.
Do not price based only on how long it took you to make it. Canva templates can help you create a product faster, and that is a good thing. Your customer is paying for the finished solution, not for every minute you spent choosing colors and moving text boxes.
Ask yourself these three simple questions:
- What problem does my download help solve?
- Who is it made for?
- What will feel easier, clearer, or more organized after someone uses it?
Write down your answers. They will help you choose a price with more confidence.
How to Price Digital Downloads a Simply Way
For your first product, keep the decision simple. Look at the type of download you made and start within a reasonable price range.
Use these beginner-friendly starting ranges
A one-page checklist, single tracker, or small printable can often start around $3 to $7. A set of matching printables, such as several budget sheets or weekly planning pages, can often start around $7 to $15.
A larger planner, a detailed guide, or a bundle of templates may fit around $15 to $29. If your product includes many pages, a clear system, or specialized help for a specific group of people, it may be worth more.
These are starting points, not strict rules. A beautiful 40-page wedding planner will usually cost more than one wedding checklist. A niche product for dog groomers, teachers, or caregivers may also earn a higher price because it solves a more specific problem.
You do not need to begin at the highest price. You also do not need to give your work away. Pick a number that feels fair, then let real customer feedback guide you.
Step 1: Look at Similar Products for Clues
Before you choose your final price, search for products similar to yours on the platform where you plan to sell. You are not copying anyone. You are simply learning what buyers are already used to seeing.
Look for products with the same purpose. If you made a daily habit tracker, compare it with other habit trackers. If you made a retirement budget planner, look for budget planners created for retirees or older adults.
Pay attention to:
- The number of pages or files included
- Whether the product is plain or fully designed
- How specific the product is
- Whether it is sold alone or inside a bundle
- The price range that appears most often
Now compare those products honestly with yours. If yours has fewer pages or fewer features, starting lower makes sense. If your design is clearer, your instructions are easier to follow, or you include helpful extras, you may be able to charge more.
Do not get stuck looking for the perfect comparison. Spend 20 minutes gathering clues, then move on. Research is helpful. Overthinking is not.
Step 2: Choose a Clear, Easy Price
Simple prices are easier for buyers to understand. For a beginner, prices such as $5, $7, $9, $12, or $15 work well.
A price ending in .99 can work too, such as $9.99. But you do not have to use it. A clean $9 price is easy to read and feels straightforward.
If you are unsure between two prices, start with the lower one for your first few sales. For example, if your printable bundle could be $9 or $12, begin at $9. After you get some sales, you can test $12.
This is not permanent. Digital products are easy to update. You can change the price later without remaking the whole product.
Step 3: Remember the Selling Fees
Most selling platforms take a small fee from each sale. Some also charge a listing fee or payment processing fee. You do not need to memorize every fee before you begin, but you should leave a little room for them.
For example, if you want to earn about $5 from a small download, pricing it at $5 may leave you with less after fees. A $7 price may give you more breathing room.
Keep this part simple. Check the fee page on the platform you choose, then make a quick note of what you will likely receive from each sale. You can use a basic calculator on your phone. No spreadsheet is required.
Step 4: Do Not Undercut Yourself
Many new sellers price everything at $1 or $2 because they are afraid people will say no. I understand that fear because putting your first product online can feel very personal.
But very low prices can create problems. You may need many sales to make meaningful extra income. Buyers may also assume a $1 product has very little value, even if it is helpful.
A low price can make sense for a tiny item, a limited sale, or a first-product test. It should not become your automatic choice for every product.
Try this instead: price a small item fairly, then create a bigger bundle later. For instance, sell one chore chart for $4, then offer a family organization pack with several charts, routines, and trackers for $12. The bundle gives buyers more choices and gives you a way to earn more without starting from scratch.
Step 5: Make the Product Match the Price
Your product listing should clearly show what the buyer gets. If people understand the value, they are more comfortable paying for it. For more help presenting your offer clearly, use this Digital Product Sales Page Template.
Use clear preview images. Show a few pages from your planner or guide. State how many pages, files, or templates are included. Tell buyers whether they can print the product, fill it out digitally, or both.
You can also add a short sentence about the result. For example: “Use this weekly meal planner to organize dinners and make grocery shopping easier.” That is much stronger than only saying, “Printable meal planner.”
A fair price feels better when the listing is clear. Your buyer should not have to guess what they are receiving.
Step 6: Review Your Price After You Get Real Data
Give your product time. Do not change the price every day because one person did not buy it.
After a few weeks, look at what happened. If people are viewing your product but not buying, the issue may be the price. But it could also be the preview images, title, product description, or the fact that the product is hard to understand at a glance.
If you are making sales easily, consider a small price increase. Raise it by $1 or $2, then watch what happens. Small changes are less stressful than big jumps.
If there are no sales yet, do not assume your product has failed. Improve one thing at a time. Make the cover image clearer, add a better description, or create a small bundle. Then give it another chance. If you’re still waiting for that first customer, follow How to Get Your First Digital Product Sale Step by Step.
When a Higher Price Makes Sense
You can usually charge more when your product saves a customer a lot of time or helps with a very specific need. A generic daily planner may have lots of competition. A planner made for new daycare providers, busy caregivers, or people managing a chronic condition may be more valuable to the right buyer.
A higher price can also make sense when you include more than one useful item. Think of a home budget bundle with a monthly budget sheet, bill tracker, debt payoff page, savings tracker, and spending log. That is more helpful than one page alone.
Just make sure the extra pages belong together. Do not add random pages only to make the bundle look bigger. Helpful beats huge.
Your First Price Is a Starting Point
Set a price, publish your product, and learn from the response. That is the real goal. You can adjust as you go.
At Digital Launch Academy, we believe your first digital product does not need to be perfect to be worth selling. Choose a fair number today, finish your listing, and let your first sale teach you more than another week of worrying ever could.

Don’t Know What to Create?
Most beginners don’t fail because they lack talent.
They fail because they’re overwhelmed by too many ideas.
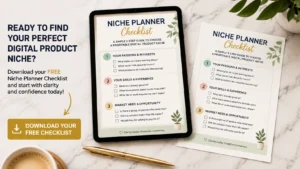
Download the Free Niche Planner Checklist and discover a digital product idea you can actually build.
Download the Free Niche Planner Checklist at the top of the side bar.
The best niche for digital products is not usually the trendiest idea online. It is a small problem you understand, for a group of people who want an easy answer. A simple planner, tracker, checklist, or guide can be more useful than a huge course with 100 lessons.
If choosing a niche feels scary, take a breath. You do not need to predict the future. You only need to pick one helpful starting point. I understand because I was there too. Too many choices can make you feel like you need to get everything perfect before you begin. You do not.
What a niche really means
A niche is simply a specific group of people and one problem you can help them solve.
For example, “planners” is too broad. But “weekly meal planners for busy moms” is a niche. “Fitness” is broad. But “walking trackers for adults over 50” is a niche.
The more clearly you can picture the person using your product, the easier it becomes to make it. You will know what words to use, what pages to include, and what problem the product should solve.
A good beginner niche does not need to be fancy. It needs to be clear.
Step 1: Start with what you already know
You do not need to be a famous expert to make a helpful digital product. Think about everyday things you have learned through work, family life, hobbies, or personal experience.
Ask yourself these simple questions:
- What do friends or family ask me for help with?
- What have I had to organize, plan, track, or learn in my own life?
- What problem have I solved the hard way that could be easier for someone else?
- What type of person do I understand well?
Maybe you have managed a household budget for years. Maybe you enjoy gardening. Maybe you have cared for an aging parent, planned family trips, taught children, or kept your own health goals on track.
These are not “small” experiences. They can become useful products.
For example, a retiree who loves gardening could create a garden planting planner. A busy parent could make a school morning routine chart. Someone who has paid off debt could create a simple monthly bill tracker.
You are not selling your whole life story. You are turning one useful piece of what you know into a tool that saves another person time or worry.
Step 2: Choose a problem that is easy to understand
The best digital products often help people get organized, remember something, make a decision, or follow a routine. These problems are simple, but they matter.
Look for problems that make people say things like:
- “I keep forgetting to do this.”
- “I do not know where to start.”
- “I need a simple way to keep track of this.”
- “I wish I had a checklist for that.”
A product does not have to solve a giant life problem. It can solve one small, annoying problem well.
Let’s say your niche is pet owners. “Pet owners” is still broad. Narrow it down to a clear need, such as a puppy feeding schedule, a senior dog medication log, or a new cat owner checklist.
Each of these ideas can become a short, useful printable. That is much less stressful than trying to build a full website or write a 50-page book.
Step 3: Use the simple niche test
Before you spend hours designing anything, test your idea with four questions. Write your answers on a piece of paper.
Can you name the person?
Avoid trying to help “everyone.” Instead, name one type of buyer.
Good examples include first-time gardeners, busy nurses, new puppy owners, people planning a wedding, and adults starting a walking habit.
Can you name the problem?
Your buyer should have one clear problem. “They want a better life” is too vague. “They need to track their daily water intake” is clear.
Can you make a simple first product?
Your first product should be possible to create in a few hours or over a weekend. Think of a one-page checklist, a five-page planner, a tracker, a set of journal prompts, or a short guide.
Would someone use it more than once?
Products people use weekly or monthly can be especially helpful. Meal planners, expense trackers, cleaning checklists, habit trackers, and appointment logs all fit this idea.
If your answer is yes to at least three of these questions, your niche is worth trying.
Step 4: Pick one of these beginner-friendly niche directions
You can begin in almost any area, but some niches work well for simple digital products because people already need help staying organized.
Home and family organization
This includes meal planners, chore charts, cleaning schedules, moving checklists, emergency contact sheets, and family budget trackers. These products are practical and easy to understand.
Health and personal routines
Think walking logs, water trackers, medication lists, self-care planners, sleep journals, and healthy meal prep sheets. Be careful not to give medical advice. Focus on organizing information and daily habits.
Hobbies and life interests
Gardening journals, reading logs, recipe cards, travel packing lists, craft project planners, and pet care trackers are all good examples. This works well when you genuinely enjoy the topic.
Work, money, and simple planning
You might create job search trackers, small business expense sheets, weekly goal planners, customer order forms, or home budget pages. Keep the product easy. A beginner does not need a complicated spreadsheet with dozens of formulas.
The best niche depends on your own knowledge and the problem you want to help solve. Do not choose a niche only because someone online says it makes money. If you dislike the topic, creating products for it will feel like a chore.
Step 5: Check whether people are already interested
You do not need expensive research tools for this step. Use common sense and look for signs that people already want help.
Search for your product idea on marketplaces and social media. Notice the words people use in product titles, comments, and questions. You are not copying someone else’s design. You are learning what buyers care about.
For example, if you see many people looking for a “weekly meal planner,” look closer. Are they asking for a low-cost grocery list page? A planner for large families? A printable that is simple enough for beginners?
That small detail can help your product stand out.
Competition is not always bad. It can mean people are already buying in that area. The goal is not to find an idea nobody has ever had. The goal is to make your version clearer, simpler, or more specific for one group of people.
Step 6: Create a tiny first product in Canva
Once you choose your niche, do not overthink the design. Your first product is practice. It does not need fancy colors, special software, or graphic design skills.
Here is a simple way to make a printable tracker in Canva:
- Open Canva and choose “Create a design.” Select US Letter Document if you want a standard printable page.
- Search Canva templates using simple words such as “habit tracker,” “meal planner,” or “checklist.” Choose a clean layout with plenty of white space.
- Change the title so it speaks to your niche. For example, change “Daily Tracker” to “My 30-Day Walking Tracker for Beginners.”
- Remove anything that does not help the buyer. Keep only the sections they need.
- Use large, easy-to-read text. Choose two or three colors at most.
- Download your finished page as a PDF Print file.
That is enough for a first product. You can always add more pages later after you learn what people like.
Step 7: Keep your first offer simple
A common beginner mistake is making too much before making a sale. You do not need 40 pages, ten bonuses, or a complicated product bundle.
Start with one useful item. A five-page weekly meal planner is enough. A set of 20 journal prompts is enough. A puppy vaccine tracker is enough.
Give the product a plain, clear name. Tell people exactly what it helps them do. For example: “Simple Monthly Budget Tracker for Beginners” is easier to understand than a clever name that leaves people guessing.
As you grow, you can create matching products in the same niche. A meal planner can later become a grocery list, pantry inventory sheet, and recipe card pack. One clear idea can lead to a small collection over time.
Your first choice does not have to be forever
Choosing a niche is not a permanent decision. It is your starting point. You can test one small product, learn from the process, and adjust as you go.
Knowing how to price digital downloads gives you the confidence to launch your product without constantly second-guessing yourself.
Pick the idea that feels useful and manageable this week. Open Canva, make one page, and let that small finished product prove to you that you can do this.
Pricing your digital download is an important step, but it’s only one part of building a successful digital product business. After setting your price, you’ll also need to create a compelling sales page, launch your product, and begin attracting customers. For a complete roadmap that takes you from your first idea to your first sale, continue with our Digital Products for Beginners guide.
Don’t Know What to Create?
Most beginners don’t fail because they lack talent.
They fail because they’re overwhelmed by too many ideas.
Download the Free Niche Planner Checklist and discover a digital product idea you can actually build.
